
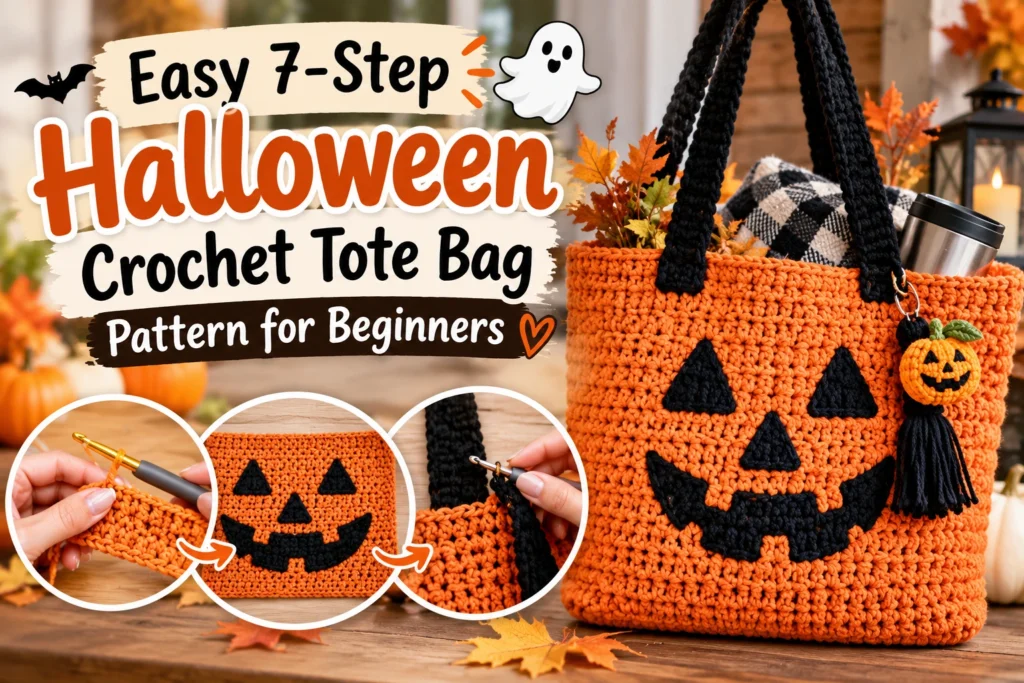
A Halloween Crochet Tote Bag is a fun way to turn a basic crochet project into something useful for autumn. This beginner-friendly pattern makes a sturdy orange bag with an optional jack-o’-lantern face, a rectangular bottom, and comfortable handles. I’ll walk you through each step, explain what to measure, and share the small checks that keep your bag neat.
Table of Contents
Why Make a Halloween Crochet Tote Bag?
A reusable handmade tote is useful well beyond one evening of trick-or-treating. I like a sturdy cotton bag because it can carry a paperback, yarn, or a few small treats without feeling flimsy. This design uses a simple rectangular base, straight sides, and two crocheted handles. The Halloween character comes from the colors and a separately stitched jack-o’-lantern face, not complicated shaping. If you can make a chain and single crochet, you can learn the rest as you go. The bag is intended for light everyday items, not heavy shopping loads. Keep an eye on young children using any bag with handles.
Materials for Your Halloween Crochet Tote Bag
Choose approximately 350–450 yards of medium-weight cotton yarn in orange for the bag, plus small amounts of black for the face. Yardage varies with tension and finished dimensions, so having an extra skein is sensible. Use a 4 mm hook, or another size that produces firm, closely packed stitches. Gather scissors, a tapestry needle, measuring tape, stitch markers, and optionally cotton fabric for a lining. The example is approximately 12 inches wide, 11 inches tall, and 3 inches deep, excluding handles. Cotton generally holds its shape better than very elastic yarn, but even cotton can stretch when overloaded. For a sturdier fabric, make a small swatch before committing to the full bag.
Stitches, Gauge, and Pattern Notes
This tutorial uses US crochet terms. Ch means chain; sc means single crochet; sl st means slip stitch; st means stitch; rnd means round; BLO means back loop only. Work a test square in single crochet: a practical starting target is about 16 stitches and 18 rows per 4 inches, although the bag can be sized by measurement. If your fabric is loose enough to see large holes, try a smaller hook. Count carefully: the first turning chain never counts as a single crochet. The pattern is worked in joined rounds once the base is finished. Place a marker in the first actual stitch of every round, not in the joining slip stitch. Measurements are approximate, and you can adjust the number of base rows or body rounds.
Step 1: Crochet a Flat Rectangular Base
Chain 49 in orange. Starting in the second chain from your hook, work one single crochet in each chain across: 48 stitches. Chain 1, turn, and single crochet in each of the 48 stitches. Repeat until you have worked 12 rows total. Your base should be roughly 12 inches long and 3 inches deep at the suggested gauge; measure it rather than forcing the dimensions. Keep your stitch count at 48 in every row. The short ends will become the sides of your tote. If you prefer a wider bag, add foundation chains; if you want more depth, add base rows. Remember that changing the base dimensions changes the finished bag and yarn requirements.
Step 2: Work Around the Base
Do not fasten off. Chain 1 and work single crochet evenly around the perimeter of your rectangle. Work 48 stitches across each long edge and 12 stitches across each short edge, placing one stitch in each row end along the short edges. This gives approximately 120 perimeter stitches; if your corners need a slight adjustment to lie flat, distribute those adjustments evenly and record your actual total. Join with a slip stitch to the first single crochet. Mark that stitch so you can identify the start of the next round. For a defined base, work the next round through back loops only, with one single crochet in each stitch. Do not add increases on subsequent rounds; the sides should start rising from the base.
Step 3: Build the Orange Tote Body
Continue in joined rounds, working one single crochet into each stitch around. Slip stitch to join each round, then chain one without counting it as a stitch. Aim for a body height of approximately 11 inches measured from the bottom of the bag. At the suggested row gauge, this may take roughly 45–50 rounds, but measure frequently. Check the width every few rounds and make sure the bag walls are not flaring or narrowing unexpectedly. If you find you have lost a stitch, correct it early rather than letting the error repeat. This is a lovely section to work while listening to music because the stitch pattern stays the same. Fasten off once the height feels right.
Step 4: Plan the Halloween Crochet Tote Bag Face
Lay the bag flat and decide which broad side will be the front. A jack-o’-lantern face is easy to recognize and doesn’t require changing the tote’s structural stitches. Cut paper triangles for two eyes and a nose, and a curved mouth shape, then arrange them on the bag until the expression looks balanced. Use these as templates for small black crocheted shapes, or embroider the face directly with black yarn and a tapestry needle. For a beginner-friendly stitched version, outline the shapes first with running stitches and fill them with closely spaced satin-style yarn stitches. Avoid long loose floats on the inside because they can snag your belongings. Secure every yarn tail on the wrong side. If the tote is intended for a child, avoid beads, buttons, or other detachable decorations.
Step 5: Mark and Crochet the Handles
Flatten the bag and locate the midpoint of each broad side. On the front rim, mark two handle attachment positions approximately 7 inches apart, centered on that side. Repeat on the back. For each handle, attach yarn securely at one marker, chain approximately 45 stitches, and anchor the chain at the matching marker on the same side. Check that the loop is comfortable to carry before proceeding. Work back along the chain with single crochet, then add another row if you want a broader strap. Repeat for the second handle, matching the length. Reinforce the handle attachment points with several tight passes of yarn through the surrounding stitches. Handle measurements are adjustable: longer straps fit over a shoulder, while shorter ones are better for hand carrying.
Step 6: Finish the Rim and Reinforce the Bag
With the handles attached, work a final edging of single crochet along exposed rim sections, keeping your tension even. Where the handles meet the bag, add reinforcement stitches without making a bulky knot. Weave in every tail by changing direction at least once through the back of the fabric. Gently flatten the bag and compare the two handles. If one is noticeably longer, adjust it now rather than hoping it will settle after use. For a bag that will hold small loose items, a simple fabric lining is worth considering. Cut lining fabric slightly larger than the bag’s inside dimensions, sew the side and bottom seams, fold under the top edge, and hand-stitch it just below the crochet rim. Avoid stitching through the outside face decoration.
Step 7: Shape and Style Your Finished Tote
Lightly mist the cotton tote or follow the yarn label’s blocking instructions. Shape the base into a rectangle and let it dry completely. Do not stretch the handles while wet. For a classic pumpkin look, keep the bag orange with a black face. For a quieter autumn style, use rust, cream, or deep green yarn. You can also replace the pumpkin face with a simple ghost silhouette or a row of embroidered stars. Try the bag with a light sweater and boots for a seasonal accessory, or use it as a reusable gift bag filled with yarn and treats. The beauty of a straightforward tote is that you can change the decoration without relearning the construction.
Common Beginner Mistakes and Easy Fixes
If your base curls sharply, your foundation chain may be too tight or your tension may be inconsistent. Try a slightly larger hook for the chain, then return to the main hook. If the sides flare, count the perimeter stitches and check that you are not accidentally increasing at corners. If the bag narrows, you may be skipping the first stitch after a join. Keep the stitch marker in place until you recognize that stitch easily. If the handles stretch, shorten them, work an extra reinforcing row, or sew a strip of cotton tape inside each handle. Finally, don’t rush the face placement: pin or baste the shapes first so they remain symmetrical.
Variations and Helpful Resources
For a striped candy-corn-inspired bag, switch between cream, orange, and yellow in wide horizontal bands. A black-and-purple version feels more mysterious, while a cream tote with a little ghost is playful without being too bold. To practice a general-purpose bag before adding decorations, see my beginner tote bag construction guide. If you’d like another project to improve stitch consistency, try my simple crochet mesh top tutorial. When you want a cozy garment next, my seven-step poncho pattern is a friendly option. For additional visual instruction, you can watch the crochet video you selected. You can also compare the design with this Halloween tote pattern listing on Etsy; it is a separate pattern, not the source of the stitch counts above.
Frequently Asked Questions
Is this Halloween crochet tote bag suitable for beginners?
Yes, the bag body uses chains and single crochet. The decoration is optional, so you can finish a plain tote first and add the face when you feel ready.
What yarn works best for a Halloween tote?
Medium-weight cotton is a practical choice for a firm bag. Test a swatch with your hook and choose a dense fabric that does not stretch excessively.
Can I use this bag for trick-or-treating?
It can carry a modest amount of lightweight candy, but crocheted handles may stretch under heavy loads. Supervise young children and reinforce the handles before use.
Do I need to sew a lining?
No, a closely stitched bag can work without one. A lining is helpful if you plan to carry small items that could slip through the stitches.
How can I make the tote larger?
Start with a longer foundation chain for more width, add base rows for more depth, and crochet additional body rounds for height. Buy extra yarn and remeasure your handle positions after resizing.
Final Thoughts
A handmade Halloween bag doesn’t need complicated stitches to feel special. Start with a neat, sturdy rectangle, build the walls patiently, and give yourself time to place the pumpkin face just where you like it. If you make one, I’d love for you to experiment with your favorite spooky color combination and use the same simple shape for other seasons too.