
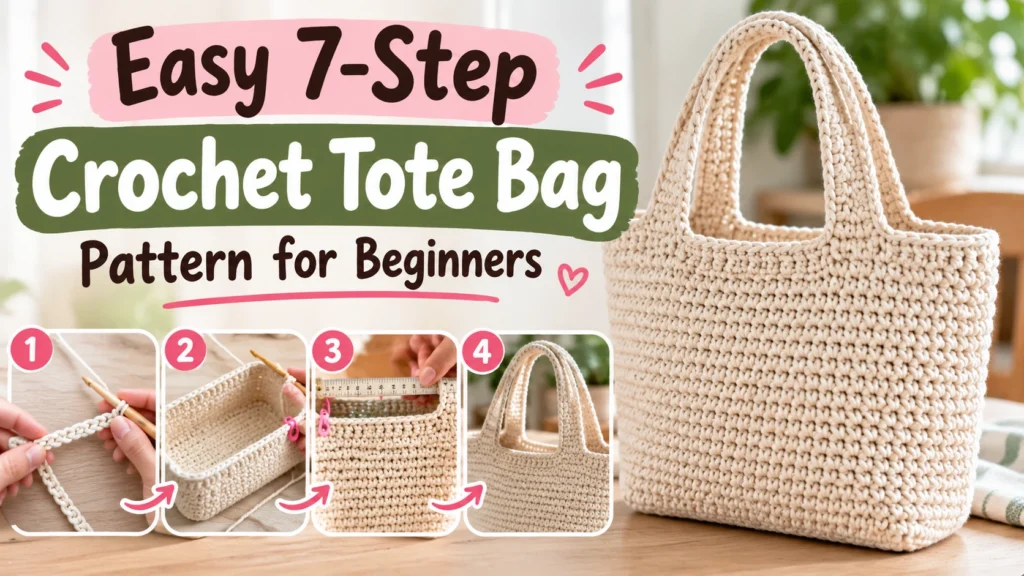
A handmade crochet tote is one of those projects that looks impressive without requiring complicated shaping. If you can work basic crochet stitches in rows and keep your edges reasonably straight, you can make a useful everyday bag.
This beginner-friendly crochet tote bag pattern uses a straightforward construction: crochet a sturdy base, build the body, create the handles, and finish everything neatly. The measurements are flexible, too, so you can make your tote smaller for everyday essentials or larger for yarn, books, or market trips.
Table of Contents
Crochet Tote Bag Pattern at a Glance
Skill level: Beginner
Terminology: US crochet terms
Construction: Base worked first, followed by the body and handles
Main stitch: Single crochet
Working method: Continuous or joined rounds, depending on your preference
Finished size: Adjustable
Best yarn: Medium-weight cotton or a firm cotton blend
Cotton is particularly useful for a tote because it normally gives the fabric more structure and less stretch than a very soft, springy yarn.
If you’re looking for more bag inspiration before choosing your colors and shape, have a look at these 15 crochet bag patterns and ideas.
Materials You’ll Need
For this project, prepare:
- Medium-weight cotton yarn
- Crochet hook appropriate for your chosen yarn
- Scissors
- Yarn needle
- Stitch markers
- Measuring tape
Check the yarn label for a recommended hook size. For a tote bag, you generally want a fairly firm fabric rather than loose, open stitches. If your stitches feel floppy, going down slightly in hook size can help, provided you can still crochet comfortably.
Crochet Abbreviations
This pattern uses US terminology:
ch – chain
sc – single crochet
st/sts – stitch/stitches
sl st – slip stitch
rep – repeat
rnd – round
Before beginning, make a small swatch of single crochet. It doesn’t need to match a fixed gauge for this adjustable project, but the fabric should feel dense enough to hold its shape.
Step 1: Crochet the Foundation for Your Tote
Start with a foundation chain that is approximately the width you want for the bottom of your bag.
Don’t worry about copying an exact chain count from somebody else’s tote. Yarn thickness, hook size, and personal tension can change the finished measurement considerably. Measuring your chain is more reliable for an adjustable bag.
Once you have the width you want, work single crochet along the foundation.
At the end, you can either build a flat rectangular base in rows or work around both sides of the foundation chain to create an oval-style bottom.
For the simplest beginner version, a rectangular base is easy to understand: work one single crochet into each stitch, chain 1, turn, and repeat until the base has the depth you want.
Keep counting your stitches. Accidentally skipping the first or last stitch is one of the easiest ways to end up with a base that gradually becomes narrower.
Step 2: Build a Firm Crochet Base
Continue working back and forth in single crochet until the rectangle reaches your preferred depth.
Try laying the base flat every few rows. The fabric should sit naturally without curling severely or forming a noticeable trapezoid.
For straight edges, count your stitches at the end of every row. If you started the row with 30 stitches, for example, you should still have 30 unless the pattern intentionally tells you to increase or decrease.
A stitch marker in the first stitch of each row can make this much easier when you’re learning.
The base determines the overall footprint of the tote, so this is also the best point to change the size. Add more rows for a deeper bag or begin with a longer foundation chain for a wider one.
Step 3: Start the Sides of the Tote
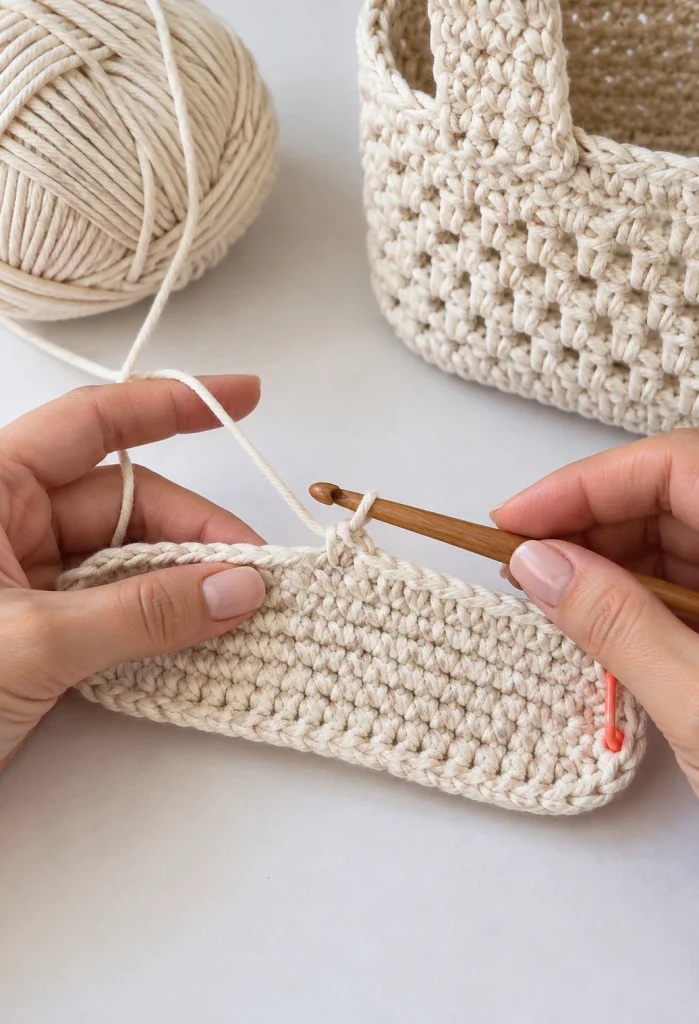
Once you’re happy with the base, begin working around its entire outer edge.
Work single crochet evenly along each side, placing stitches around the perimeter. The goal is to create the first round that will allow the walls of the tote to grow upward.
Use stitch markers at the corners if that helps you see where each side begins.
Avoid packing too many stitches along the row-end edges. Too many can make the fabric ripple; too few can pull and distort the base.
After establishing the first round, continue crocheting upward without adding stitches if you want relatively straight sides.
[IMAGE 2 — PLACE AFTER THIS SECTION]
Prompt:
Detailed realistic overhead crochet tutorial photo showing a cream cotton rectangular crochet bag base with the sides beginning to rise around its perimeter. Two hands are crocheting single crochet along the edge, with four small stitch markers identifying the corners. Clearly show the transition from flat rectangular base to upright tote walls, natural cotton texture, bright daylight, uncluttered neutral background, instructional step-by-step composition, no text.
Alt text:
Crocheting around the base to begin the sides of a crochet tote bag.
File name:
crochet-tote-bag-pattern-step-3-sides.jpg
Step 4: Crochet the Main Body
Now comes the relaxing part.
Continue working one single crochet into each stitch around the tote. If you’re working in continuous rounds, put a marker in the first stitch and move it upward each time you complete another round.
If you’re using joined rounds, join each round with a slip stitch and follow the same method consistently throughout the body.
Periodically place the bag on a flat surface and check the shape. You want the sides to rise fairly evenly from the base.
Continue until the body reaches the height you want, stopping before the handles begin.
Single crochet creates a practical, fairly dense tote, but you can customize future versions with stripes or textured stitches once you’re comfortable with the basic construction.
For another beginner project that uses a very different, airy fabric, you can also see this crochet mesh top tutorial.
Step 5: Mark the Handle Positions
Lay the tote flat and decide where you want each handle.
This step is worth measuring rather than guessing.
Place a stitch marker at the beginning and end of each planned handle opening. Check that the front and back handles are centered and that both openings are the same width.
Crochet normally until you reach the first marker. Instead of crocheting through the stitches between your two handle markers, make a chain long enough to form the desired opening. Skip the corresponding number of stitches below, then continue crocheting into the bag.
Repeat on the opposite side.
The exact chain length depends on your yarn, tension, bag width, and how large you want the handles, so check the opening before committing to it.
[IMAGE 3 — PLACE AFTER THIS SECTION]
Prompt:
Realistic beginner crochet tutorial photograph of a partially finished cream cotton crochet tote bag laid flat on a light wooden work surface. Four stitch markers clearly mark symmetrical handle positions near the top edge. One hand measures the spacing with a flexible measuring tape while the other holds the bag flat. Show the handle chain beginning between two markers, crisp crochet stitches, bright natural lighting, overhead instructional photography, no text or decorative props.
Alt text:
Measuring and marking even handle openings on a beginner crochet tote bag.
File name:
crochet-tote-bag-pattern-step-5-handles.jpg
Step 6: Strengthen the Crochet Handles
On the following round, crochet across the chain spaces you created for the handles.
Continue for additional rounds around the entire top of the tote. This builds thickness around the handle openings and makes the top edge feel more finished.
Pay particular attention to the points where each handle joins the bag. These areas receive a lot of stress when the tote is carrying something.
If the handles feel too narrow, add more rounds. If they stretch excessively, you may want to make the handle openings shorter on your next bag or reinforce them with additional crochet.
Try holding the tote as you work. A handle that looks perfect lying flat may feel different in your hand.
Step 7: Finish and Shape Your Tote
When you’re satisfied with the top edge and handles, fasten off and leave a tail long enough to weave in securely.
Thread the tail onto a yarn needle and weave it back through several stitches. Change direction once or twice rather than simply pulling the tail through a straight line.
Repeat with any remaining yarn ends.
Then gently shape the tote with your hands. Check the bottom, corners, sides, and handles.
Your bag is now ready to use.
[IMAGE 4 — PLACE AFTER THIS SECTION]
Prompt:
Realistic final step of a beginner crochet tote bag tutorial showing a completed structured cream cotton crochet tote standing upright on a clean light wooden table. Clearly visible dense single crochet texture, rectangular base, even sides and two reinforced integrated handles. A yarn needle and small remaining yarn tail sit beside the bag to suggest finishing. Bright soft natural light, front three-quarter camera angle, handmade but polished appearance, educational crochet blog photography, no text.
Alt text:
Finished cream crochet tote bag after completing and reinforcing the handles.
File name:
finished-beginner-crochet-tote-bag-pattern.jpg
How to Make Your Crochet Tote Bag Bigger or Smaller
One advantage of this construction is that you don’t need several completely different patterns for different bag sizes.
For a wider tote, begin with a longer foundation chain. For a deeper base, crochet more base rows. For a taller tote, simply continue the body for additional rounds before beginning the handles.
Make changes gradually and measure as you go.
Remember that changing the dimensions also changes the amount of yarn required, so it’s sensible to have extra yarn available when making a larger version.
Common Beginner Problems
If your tote gets narrower as you crochet, recount your stitches. You may be accidentally missing the first or last stitch.
If the base or sides ripple, check your stitch placement and make sure you haven’t unintentionally added extra stitches.
If the bag stretches more than you expected, the combination of yarn, hook size, and stitch tension may be producing fabric that is too loose. A firmer cotton yarn and tighter fabric can help.
Uneven handles usually come from positioning rather than the crochet itself. Before making the chain openings, lay the tote completely flat and count or measure the distance from each side.
For another project organized into manageable beginner steps, see the 7-step crochet poncho pattern.
Helpful Video Tutorial
If you learn more easily by watching the hook movements, you can follow the Crochet Basic Tote Bag Tutorial | Step by Step tutorial alongside the written instructions.
A video can be especially helpful when you’re learning how to hold the work, identify the next stitch, or understand how a flat crochet base develops into the body of a bag.
Crochet Tote Bag Pattern FAQ
What yarn is best for a crochet tote bag?
Cotton is a practical choice because it can produce a sturdy fabric with good stitch definition. The exact yarn weight is flexible, but remember that changing yarn thickness will affect the size and feel of the bag.
Can a beginner crochet this tote?
Yes. The construction centers on basic stitches and simple shaping. The areas that deserve the most attention are maintaining your stitch count, crocheting evenly around the base, and positioning both handles symmetrically.
Do I need to line my crochet tote?
Not necessarily. A dense single-crochet tote can be used without lining. A fabric lining can be added if you want extra structure or plan to carry small objects that could poke through the crochet fabric.
Why is my crochet tote stretching?
Crochet naturally has some give, and the weight inside a bag can increase that stretch. Yarn choice, stitch density, handle length, and how heavily the tote is loaded all affect its final shape.
Final Thoughts
This crochet tote bag pattern is deliberately simple: start with a flat base, build the sides, create evenly positioned handles, reinforce the top, and finish the yarn ends securely.
Once you understand that basic construction, you can make the design your own. Try a different size, add stripes, alternate colors, or experiment with another sturdy stitch.
Most importantly, measure and count as you work. Those two small habits make a noticeable difference when you’re learning to crochet bags.