
A cozy poncho is one of those crochet projects that looks impressive without needing complicated shaping. This crochet poncho pattern is designed with beginners in mind, using simple construction, an open texture, and a pretty fringed edge inspired by the mustard-yellow boho poncho shown above.
Instead of trying to reproduce its intricate circular motifs exactly, we’ll create a beginner-friendly version with two crocheted rectangles. Once joined at the shoulders and sides, those simple pieces become an easy, drapey poncho you can layer over a long-sleeved top, jeans, or a dress.
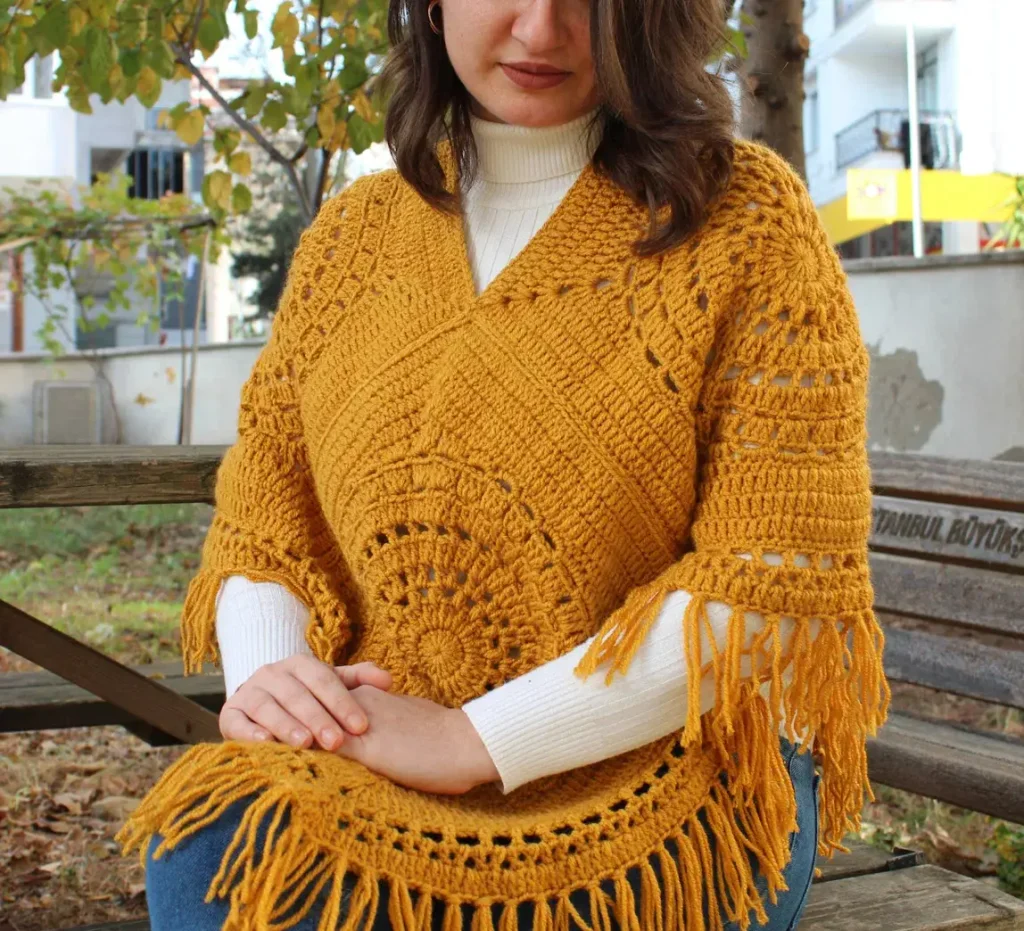
Crochet Poncho Pattern at a Glance
Skill level: Beginner
Terminology: US crochet terms
Construction: Two rectangles joined together
Main stitches: Chain and double crochet
Style: Loose, openwork, fringed poncho
Fit: Relaxed and customizable
This version deliberately uses a simple rectangular construction. That makes it much easier to adjust the width and length without having to calculate complicated increases around a circular yoke.
Materials You’ll Need
For this project, gather:
- Medium/worsted weight (#4) yarn
- 6 mm (J-10) crochet hook
- Scissors
- Yarn needle
- Measuring tape
- Stitch markers
- Extra yarn for fringe
A medium-weight yarn gives the poncho enough structure while still allowing it to drape. The Craft Yarn Council classifies worsted, afghan, and aran yarns as category #4 and lists 5.5–6.5 mm crochet hooks as a typical range. These are guidelines rather than fixed rules, so your yarn label and desired fabric should also guide your hook choice.
For a look similar to the inspiration piece, mustard, ochre, rust, olive, cream, or another warm earthy shade works beautifully.
Crochet Abbreviations
ch – chain
dc – double crochet
st/sts – stitch/stitches
sp – space
rep – repeat
FO – fasten off
The instructions below use US crochet terminology.
Step 1: Decide the Size of Your Poncho
The easiest way to customize this beginner crochet poncho is by working to measurements rather than relying on one fixed stitch count.
Each rectangle will eventually form part of the front and back of the poncho. For an adult relaxed fit, aim for rectangles approximately 18–22 inches wide and 28–32 inches long, adjusting these measurements to the wearer.
If you prefer a shorter poncho, stop earlier. For a more dramatic, oversized look, add length before assembly.
Before committing to the full project, crochet a small swatch. Gauge matters whenever you want the finished dimensions to be predictable; changing yarn, hook size, or personal tension can change the size of your fabric.
Step 2: Crochet the Foundation Chain
Using your chosen yarn and 6 mm hook, make a foundation chain until it reaches your desired rectangle width.
For the stitch pattern below, use an even number of chains, then add 3 chains for turning.
Try not to make the foundation chain too tight. A tight starting edge can pull in while the rest of the fabric remains loose.
Beginner tip: if your chains naturally run tight, make the foundation with a hook one size larger, then switch back to your main hook.
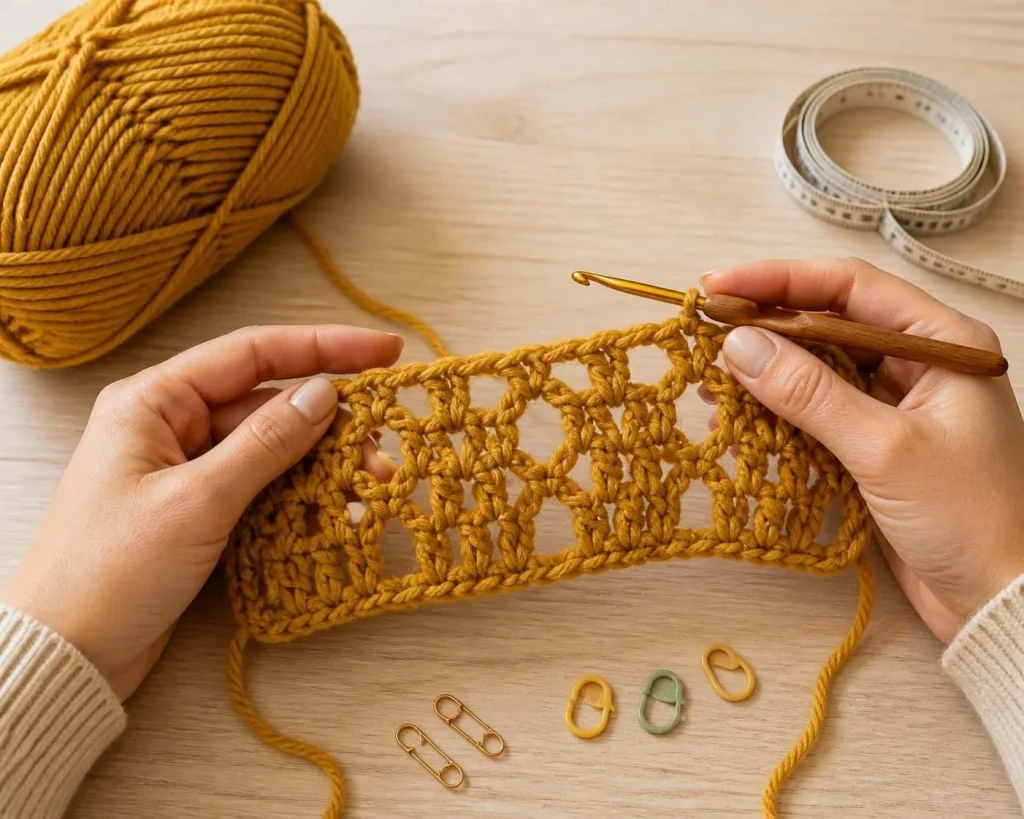
Step 3: Work the First Openwork Row
Double crochet in the fourth chain from your hook.
Then work:
Ch 1, skip 1 chain, dc in the next chain.
Repeat this sequence across the foundation chain.
The combination of double crochet stitches and chain spaces produces a simple mesh-like texture. It gives the poncho a lighter feel and creates some of the airy character seen in boho crochet garments.
Turn your work at the end of the row.
Step 4: Continue the Main Stitch Pattern
Chain 3 at the beginning of the next row. For this pattern, the turning chain counts as the first double crochet.
Work a double crochet into the next double crochet from the previous row, then:
Ch 1, dc into the next dc.
Continue across, placing your double crochets into the double crochets from the previous row and leaving the chain spaces open.
Repeat this row until the panel reaches your chosen length.
Check your work every few rows. Your edges should remain straight, and the number of double-crochet columns should stay consistent.
If the panel starts becoming narrower, you may have accidentally skipped the final stitch. If it gets wider, check that you haven’t added an extra stitch near the turning chain.
Step 5: Make a Second Matching Panel
Fasten off your first rectangle and make a second one using exactly the same method.
Lay the two pieces flat beside each other before assembly. They should be approximately the same width and length.
Small differences can often be corrected during blocking, but a noticeably different panel usually means the stitch count or tension changed somewhere.
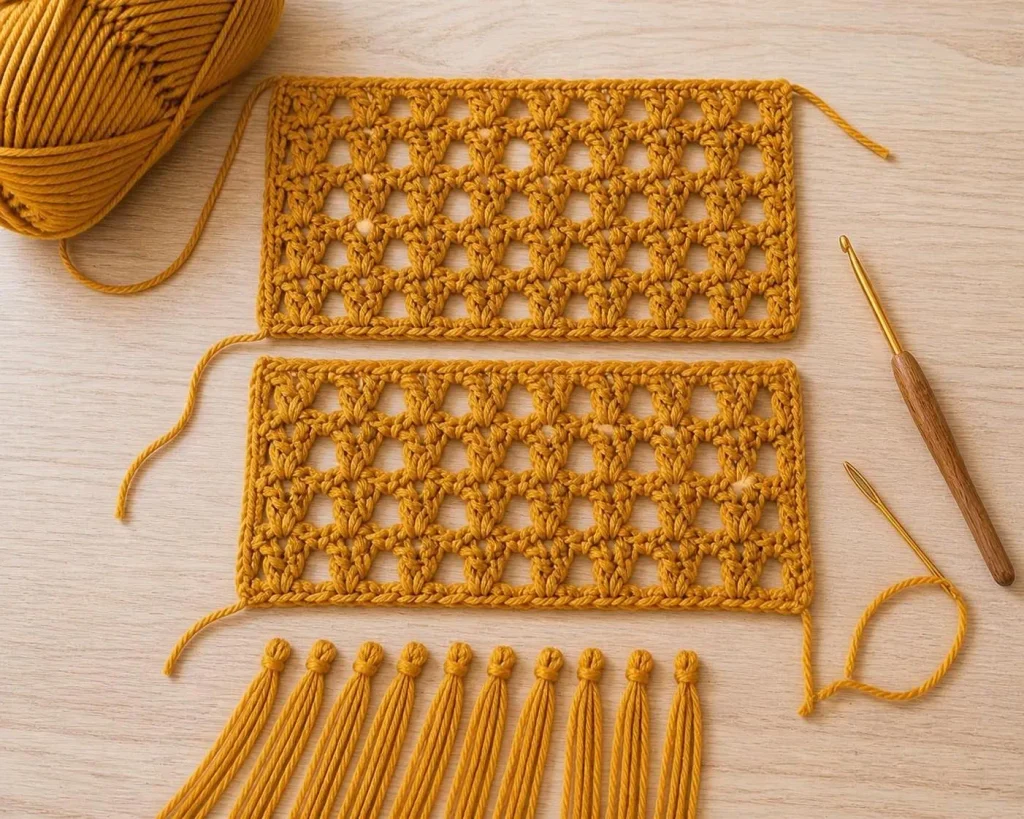
Step 6: Join the Poncho
Place the rectangles together and mark the center neckline area with stitch markers.
Join the shoulder sections while leaving enough space in the center for your head to pass through comfortably. You can seam with a yarn needle and matching yarn or use slip stitches with your crochet hook.
Try the poncho on before permanently finishing all seams.
Next, decide how open you want the sides. You can leave them mostly open for a traditional poncho shape or add short side seams below the arm openings for a little more structure.
This is also the best time to adjust the neckline. Keep it simple and relaxed, or work a round of single crochet around the opening for a cleaner finish.
Step 7: Add the Fringe
Fringe changes the personality of this project immediately and brings it closer to the relaxed boho style of the inspiration poncho.
Cut multiple yarn strands to approximately twice the finished fringe length you want.
For each fringe section:
- Fold the strands in half.
- Insert your hook through a stitch or chain space along the lower edge.
- Pull the folded loop through.
- Pass the loose ends through that loop.
- Pull gently to secure.
Continue around the desired lower edges, spacing the fringe evenly.
When you’re finished, place the poncho flat and trim the fringe so the ends look tidy.
Finishing Your Crochet Poncho
Weave in every loose yarn end with a yarn needle. Pay particular attention to the shoulder joins because these areas receive more movement when the poncho is worn.
Light blocking can help the openwork settle and make the two panels hang more evenly. Follow the washing and care instructions for your specific yarn rather than assuming every fiber can be blocked or washed in the same way.
The finished poncho can be worn over a fitted long-sleeved shirt during cooler weather or over a lighter top when you want an airy layer.
Want More Crochet Poncho Patterns?
Once you’ve made this simple version, you can experiment with granny stitches, denser textures, stripes, color changes, or decorative borders.
You can browse more crochet poncho patterns for your next project.
Prefer to Buy a Handmade Poncho?
If you love the detailed circular motif in the reference design but don’t want to crochet one yourself, the original inspiration is available as a handmade item on Etsy. The listing describes an openwork crochet poncho with fringe that can be ordered in several sizes and colors.
Common Beginner Questions
Can I make this crochet poncho longer?
Yes. Simply continue the repeating rows on both panels until they reach your preferred length. Remember that adding length also increases the amount of yarn you’ll need.
Can I use a different yarn weight?
You can, but changing yarn weight will change the fabric and potentially the finished dimensions. Rather than relying on the same chain count, make a swatch and work your foundation chain to the desired physical width.
How can I make the poncho warmer?
Choose a less open stitch pattern or use a suitable warmer fiber. You can also reduce the chain spaces and create a denser fabric, although doing so changes the appearance of the pattern.
Why are my edges uneven?
The most common issue is accidentally adding or missing a stitch at the beginning or end of a row. Count your double-crochet columns regularly and pay close attention to the turning chain.
Final Thoughts
This crochet poncho pattern keeps the construction approachable: make two openwork rectangles, join them, finish the neckline, and add fringe.
Once you’re comfortable with the basic shape, it’s an easy project to personalize. Change the length, leave off the fringe, add stripes, or experiment with a decorative border. The simple construction gives you plenty of room to make the finished poncho your own.